



Quarter-by-Quarter
| Team | Q1 | Q2 | Q3 | Q4 | Final |
|---|---|---|---|---|---|
| St Kilda | 1.4 10 | 4.12 36 | 6.16 52 | 7.19 61 | 61 |
| Carlton | 2.6 18 | 6.12 48 | 13.16 94 | 17.21 123 | 123 |
Match Report
Umpire: D.Jolley
Goalkickers: S.Jackson 6.4, A.Jesaulenko 4.8, P.Jones 4.1, R.Walls 2.1, J.Nicholls 1.0, B.Crosswell 0.3, B.Thornley 0.1, S.Silvagni 0.1, Rushed 0.2. Best: B.Crosswell, S.Jackson, J.Nicholls, A.Gallagher, A.Jesaulenko, P.Jones, I.Robertson, G.Crane.
Best: B.Crosswell, S.Jackson, J.Nicholls, A.Gallagher, A.Jesaulenko, P.Jones, I.Robertson, G.Crane.
Reports: Nil
Injuries: J.Goold (burst blood vessel in calf), B.Quirk (strained shoulder ligament), A.Jesaulenko (twisted ankle).
Game Review
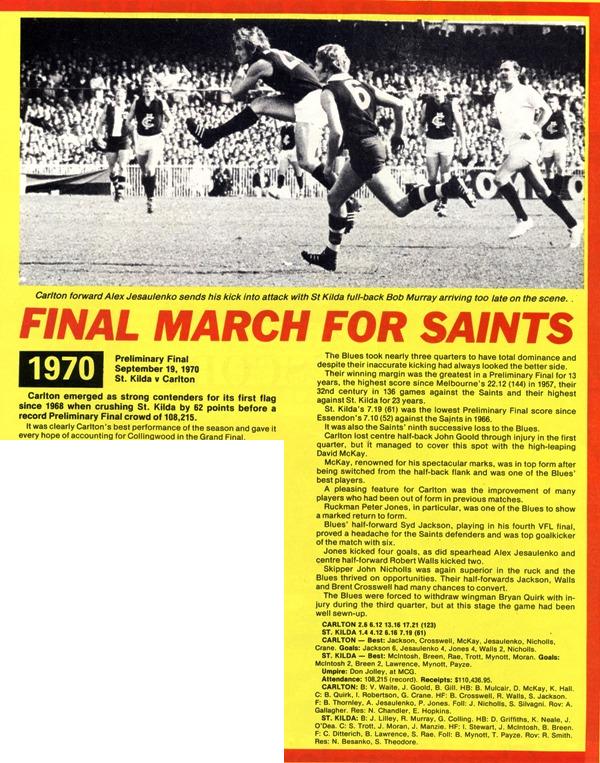
Carlton's half-forward line dominated this match. Brent Crosswell was Best on Ground, Syd Jackson kicked six superb goals, and Robert Walls was a focal point all match at centre half-forward. The Blues won by ten goals, but it should have been more, because we coasted in the second half. The Blues' run on began with Peter Jones who kicked 3 goals in 12 minutes early in the third quarter.
Alex Jesaulenko playing in windy conditions kicked 3 behinds and one out of bounds before scoring his first goal during the first term. He had 1.5 before kicking his second goal mid way in the second quarter. He suffered an injury to his right ankle early in the second term.
Bryan Quirk's injury was the result of friendly fire from team mate Barry Mulcair who accidently gave him a solid bump about 20 minutes into the third quarter. This injury would result in Quirk missing next week's Grand Final.
This was Carlton's highest score against St. Kilda in 23 years. Carlton's ninth successive win against St. Kilda.
Stats
Kicks: Carlton 240 - St.Kilda 203
Marks: Carlton 78 - St.Kilda 53
H/Balls:Carlton 60 - St.Kilda 30
H/Outs: Carlton 40 - St.Kilda 27
Frees: Carlton 27 - St.Kilda 40
Team
B: | 21 Barry Gill | 11 John Goold | 30 Vin Waite |
HB: | 3 Kevin Hall | 43 David McKay | 35 Barry Mulcair |
C: | 6 Garry Crane | 34 Ian Robertson | 32 Bryan Quirk |
HF: | 5 Syd Jackson | 42 Robert Walls (acting vc) | 17 Brent Crosswell |
F: | 28 Peter Jones | 25 Alex Jesaulenko | 13 Bert Thornley |
Ruck: | 2 John Nicholls (c) | 1 Serge Silvagni | 10 Adrian Gallagher |
Res: | 22 Neil Chandler | 7 Ted Hopkins | |
Coach: | Ron Barassi | ||
Video
Player Statistics

Carlton
| # | Player | KI | HB | DI | MK | GL | BH | GA | IF | MI | UP | BO | TK | RB | 1% | FF | FA | CP | CM | CL | CG | HO | BR | %P |
|---|---|---|---|---|---|---|---|---|---|---|---|---|---|---|---|---|---|---|---|---|---|---|---|---|
| 1 |  Sergio Silvagni | 20 | - | 20 | 6 | - | - | - | - | - | - | - | - | - | - | 1 | 2 | - | - | - | - | - | - | - |
| 2 |  John Nicholls | 9 | 5 | 14 | 2 | 1 | 1 | - | - | - | - | - | - | - | - | 1 | 5 | - | - | - | - | 10 | - | - |
| 3 |  Kevin Hall | 9 | - | 9 | - | - | - | - | - | - | - | - | - | - | - | - | 2 | - | - | - | - | - | - | - |
| 5 |  Syd Jackson | 25 | 3 | 28 | 8 | 6 | 3 | - | - | - | - | - | - | - | - | 2 | 5 | - | - | - | - | - | - | - |
| 6 |  Gary Crane | 21 | 4 | 25 | 3 | - | - | - | - | - | - | - | - | - | - | 1 | 1 | - | - | - | - | - | - | - |
| 7 |  Ted Hopkins | 1 | 2 | 3 | - | - | - | - | - | - | - | - | - | - | - | - | - | - | - | - | - | - | - | - |
| 10 |  Adrian Gallagher | 23 | 2 | 25 | 3 | - | - | - | - | - | - | - | - | - | - | 4 | 3 | - | - | - | - | - | - | - |
| 11 |  John Goold | 2 | - | 2 | - | - | - | - | - | - | - | - | - | - | - | - | 1 | - | - | - | - | - | - | - |
| 13 |  Bert Thornley | 8 | 1 | 9 | - | - | 1 | - | - | - | - | - | - | - | - | - | 5 | - | - | - | - | - | - | - |
| 17 |  Brent Crosswell | 25 | 10 | 35 | 12 | - | 3 | - | - | - | - | - | - | - | - | 2 | 2 | - | - | - | - | - | - | - |
| 21 |  Barry Gill | 8 | 1 | 9 | 2 | - | - | - | - | - | - | - | - | - | - | - | 1 | - | - | - | - | - | - | - |
| 22 |  Neil Chandler | 10 | 3 | 13 | 2 | - | - | - | - | - | - | - | - | - | - | 1 | 2 | - | - | - | - | - | - | - |
| 25 |  Alex Jesaulenko | 16 | 1 | 17 | 11 | 4 | 7 | - | - | - | - | - | - | - | - | 1 | 2 | - | - | - | - | - | - | - |
| 28 |  Peter Jones | 11 | 6 | 17 | 7 | 4 | 3 | - | - | - | - | - | - | - | - | 3 | 2 | - | - | - | - | 12 | - | - |
| 30 |  Vin Waite | 7 | 5 | 12 | - | - | - | - | - | - | - | - | - | - | - | 3 | 1 | - | - | - | - | - | - | - |
| 32 |  Bryan Quirk | 8 | 2 | 10 | 2 | - | - | - | - | - | - | - | - | - | - | 2 | 1 | - | - | - | - | - | - | - |
| 34 |  Ian Robertson | 14 | 2 | 16 | 6 | - | - | - | - | - | - | - | - | - | - | - | 5 | - | - | - | - | 1 | - | - |
| 35 |  Barry Mulcair | 5 | 2 | 7 | 1 | - | - | - | - | - | - | - | - | - | - | 1 | - | - | - | - | - | - | - | - |
| 42 |  Robert Walls | 16 | 3 | 19 | 7 | 2 | 2 | - | - | - | - | - | - | - | - | 4 | 1 | - | - | - | - | - | - | - |
| 43 |  David McKay | 12 | 5 | 17 | 7 | - | - | - | - | - | - | - | - | - | - | - | - | - | - | - | - | - | - | - |
| Team Total | 250 | 57 | 307 | 79 | 17 | 20 | - | - | - | - | - | - | - | - | 26 | 41 | - | - | - | - | 23 | - | - | |
| Team Average | 12.5 | 2.9 | 15.3 | 4.0 | 0.8 | 1.0 | - | - | - | - | - | - | - | - | 1.3 | 2.0 | - | - | - | - | 1.1 | - | - | |
Photos from St Kilda vs Carlton
Last updated by Jamie Sanderson ·